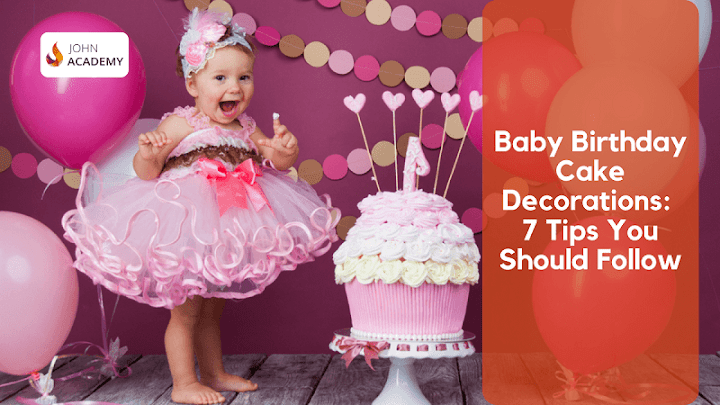
Baby Birthday Cake Decorations: 7 Tips You Should Follow

May 15, 2022

 Baby Birthday Cake Decorations: 7 Tips You Should Follow


It smells like something is baking.
Oh, wait, are you baking a baby birthday cake?
Did you decide on the decoration yet?
Or are you new to this?
Let’s help you with the baby birthday cake decorations.
Whether you are new to this whole cake decorating thing or just looking for tips for baby birthday cake decorations, we got your back.
Let’s see how to make the best day for a baby even more special with 7 tips for baby birthday cake decorations.
Baby Birthday Cake Decorations
A baby’s birthday is a special occasion to celebrate.
Parents and family members want to rejoice and celebrate the baby’s growth from the moment the baby is born.
Though a baby, the little ones start to develop their personality and begin to have colour preferences and cartoons and characters they love.
The occasion is altogether incomplete if there is no cake in it.
A baby birthday cake is the centerpiece of decoration during the birthday celebration.
All the wishes are made, and birthday songs are sung around it.
Furthermore, the cake needs to have a really beautiful decoration to cheer your little one up and make the whole day memorable.
If you are making a birthday at home or taking a birthday cake order from your bakery, you need to keep many things in mind to make the best birthday cake.
Moreover, two things that you cannot compromise about a birthday cake are its taste and decoration.
The taste and decoration of the cake go hand in hand.
There should be a balance between the taste of the cake and its decoration whether you are making chocolate, vanilla, strawberry or red velvet cake.
Your decoration must also enhance its flavor if you are using edible decorations.
For the decoration of the cake, you need to figure out the details of the cake.
For example, its shape, layers, whether it should use frosting, icing or a fondant to cover the cake and the characters and decoration thing that you will use.
What is more, John Academy has a professional course Diploma in Baking & Cake Decorating.
Here, you can learn to make some spongy soft cakes, how to create layers, making amazing frosting and decorating them with all kinds of techniques like fondant.
Diploma in Baking & Cake Decorating
You’ll learn the secrets to making the perfect wedding cake, celebration cake and birthday cake like a pro.
7 Tips for Baby Birthday Cake Decorations
If you are new to cake decorating, it may seem tricky at first.
However, achieving the decoration of a birthday can be fairly easy with simple tips and tricks, and we are all in to explain the details of baby birthday cake decorations.
So let’s decorate the yummiest and fun birthday cake.


1. Plan a Theme for the Cake
You must always plan the cake and have a theme for it.
The theme of the cake mostly depends on the person you are making it for.
Therefore, if you are taking orders for a baby birthday cake or making one for your own baby, try to find out what the baby likes the most.
You can go for the baby’s favorite color, which is one of the easiest themes to work with.
You can create any shape of the cake and give it a simple yet fun decoration using frosting of different colors scheme.
Likewise, you can also choose the baby’s favorite activity, toys, cartoon characters and so on to create the birthday cake of that shape and look.
Pick up an iconic feature of the baby’s favorite book, TV show, animals or characters that you can easily recreate without any hassle.
For example, you can create a panda cake with black and white frosting or a mini mouse cake with a pink bow.
2. Assemble Cake Decorating Tools
Having a stock of cake decorating supplies can be handy, even if it’s an occasional thing.
But if you are a professional baker or trying to be one, it is essential to have your supplies ready to decorate your customized cakes.
A baker is as good as the tool they are using to make and decorate the cake.
Firstly, turntables can be a lifesaver when it comes to decorating the cake.
It makes the cake frosting much easier and cleaner.
It also saves your energy that you might waste moving around the cake while decorating it.
Secondly, you will need knives and spatulas for cake decoration.
A serrated knife is handy for shaping the cake.
A frosting spatula or palette knife will help you to spread any kind of cream or frosting.
For frosting, you will also need frosting bags.
You can get it from stores and also make it at home, which is cheaper.
You will need a quarter or gallon-sized plastic or zip-lock bag depending on the amount of frosting you will use.
Last but most important are piping tools.
They are handy gadgets to decorate your cake just like you want with different styles and techniques.
You can find piping nozzles with different shapes and sizes with which you can design flowers by placing them in the hole of the frosting bags.
Here are some more lists of kits that you must need for decoration.
  • Measuring cups
  • Different kinds of knives
  • Mixing bowls for frosting
  • Electric beater
  • Piping bag
  • Scissors
  • Stencils
  • Toothpicks
  • Candles
  • Cookie-cutter
3. Decide Cake Toppings
You can do baby birthday cake decorations in any way you find it comfortable.
There are also plenty of edible cake decorations that you can place on top of the cake.
You can use lots of decorations like supplies that are edible and also inedible.
For inedible decorations, you can use figurines and models.
For example, you can find Barbie Elsa or Anna, place it on top of the cake and decorate it with other edible decorations.
Here are some of the edible decorations you must keep a stock of:
1. Chocolate chips
2. Edible glitter
3. Fondant
4. Food coloring
5. Frosting
6. Fruit
7. Nuts
8. Sprinkles
9. M&M’s
Moreover, you can also use cupcakes, doughnuts and marshmallows on a stick and dripped in different color chocolates to decorate your cake.


3 Simple Cake Decorating Hacks for Beginners
4. Check the Evenness of the Cake
When you are done baking the cake and just took it out of the oven.
The top of your cake might be uneven or have a domed shape.
Having a flat top makes it easier for you to frost and decorate it.
Otherwise, you might worry the cake will look uneven, and the decoration might slide down the dome portion of the cake.
You can correct it and make the cake even in many ways.
Firstly, if the cake is uneven or has risen to have a dome shape on top, then gently press a flat plate on top of your cake right after taking it out of the oven.
It will help to flatten the cake top.
Secondly, you can also trim the top of your cake using a serrated knife.
For this, you will also need a revolving turntable.
Start by cutting the edges of the cake by slowly rotating the cake.
Once the whole edge is done, slowly cut your way through the deeper part of the cake.
Do this till you have achieved a flat top.
Moreover, you can check the evenness of the cake by using a clean cupboard by placing it on top of the cake.
If the cardboard stays flat on top of the cake, then your cake is even.
You must also check the temperature of the oven, which can be the major reason for an uneven cake.
Too high a temperature may cause your cake to rise unevenly.
Avoid this issue by double-checking your oven temperature with a thermometer.
Do not forget to tap the cake tin baking try a few times.
This will eliminate any kind of bubbles in the cake batter, which also causes the cake to rise unevenly.


5. Cool Down Your Cake Completely Before Decoration
For perfect baby birthday cake decorations, it is really important to completely cool down your cake after decorating it.
Decorating and frosting a warm cake will only cause the frost, fondant or icing to melt out and create a messy puddle of decoration.
Furthermore, the shape of the cake changes in size when it cools down.
Therefore, your decoration will be more stable if you work with a cool cake.
Here are the things you can do to cool down your cake.
  • Place your cake on a cooling rack or on a counter away from any kind of heat for 5-10 minutes.
  • For cooling quicker and also locking the moisture of the cake, put it in the refrigerator.
  • Wrap 2 layers of plastic wrap around the cake and seal it inside a mould to stop it from drying out.
  • Place your cake back into the refrigerator for 1-2 more hours.
6. Frosting Your Cake


Now let’s come to the most important part of the baby birthday cake decorations.
It is time for frosting.
From the taste of your frosting to the texture and color of your frosting, everything impacts the overall taste and decoration of the cake.
So we will discuss some common frosting that you can use for baby birthday cake decorations.
a. Buttercream Frosting
The most common form of frosting is buttercream frosting, and it goes along with almost any kind of cake.
It is made from beating the butter with an electric beater until it’s fluffy and creamy.
Once the butter has reached a glazy and creamy texture, you need to add powdered sugar gradually and beat the mixture until it becomes creamy and light.
You can also modify the buttercream frosting by adding some flavors like Vanilla, Chocolate, or Lemon.
You can also add food color to modify its color.
b. Whipped Cream Frosting
You can prepare whipped cream by whipping heavy cream with powdered sugar until it holds its peaks.
Whipped cream goes well with chocolate, black forest or pineapple cake.
c. Cream Cheese Frosting
This is a variety of the classic Buttercream frosting, with the primary components being butter, sugar, cream cheese, and lemon for extra flavor.
Red Velvet Cake, Carrot Cake, and Lemon Cake are the most popular cakes with cream cheese frosting.
d. Meringue Frosting
Meringue frosting is formed by beating egg white on a double boiler and combining them with sugar until they are opaque white and very creamy and fluffy in texture.
After decorating the Meringue, it’s also popular to toast it using a blowtorch.
7. Crumb Coat The Cake First Before Applying The Thick Frosting


One of the biggest problems you will face while frosting your cake is that the cake crumbs mix with the frosting you are using.
As a result, your cake might not look so clean and look rough.
This brings us to the next tip of baby birthday cake decorations which is to crumb coat your cake before applying the frosting.
A crumb coat is layering your cake with a thin layer of frosting before applying the main layer of frosting.
The crumbs will be trapped by your crumb coat, which will preserve your main layer of frosting, making it look nice and clean.
To do the crumb coating, spread a thin layer of frosting with a knife or an offset spatula until you can see the cake underneath.
Leave the cake in a refrigerator for 30 minutes to 24 hours so that the coating is set in properly.
Apply the main layer of frosting after the crumb coating is set and achieve a smoothly frosted cake.
8. Use a Piping Bag and Variety of Cones to Create Different Designs


You can add details and designs to your cake using a piping bag.
Fill up a piping bag with frosts and use the end of the piping bag to direct the stream of frost.
For this, cut the tip of your piping bag according to the thickness of the design you want to create.
You can also buy nozzles or tips for your piping bag with different designs.
Here are some of the different shapes and designs you can create with special effect tips or nozzles.
1. You can use round tip nozzles to line the border of the cake.
You can create simple lines with them, dots and write messages with them on the cake.
2. With the help of a star tip nozzle, you can create shapes like stars, flowers, shells, boarders and rosettes.
3. Through basket-weave tips, you create lattices and lines that look like ribbons, and you can make many other amazing borders and designs.
Diploma in Baking & Cake Decorating
You’ll learn the secrets to making the perfect wedding cake, celebration cake and birthday cake like a pro.
Enrol Now
Diploma in Baking & Cake Decorating
You’ll learn the secrets to making the perfect wedding cake, celebration cake and birthday cake like a pro.
Enrol Now
Ready to Decorate!
Following these tips, you can make baby birthday cake easily and beautifully.
Apply your creativity or take inspiration from plenty of different baby birthday cake decorations you can find online.
If it is your first time, start it simple, and if you follow these tips, you can create a beautiful cake.
If you need more help with baking and decorating a cake, you can sign up for our course, Diploma in Baking & Cake Decorating, and get professional training.


Read more blogs


300 Recipes on the Grill

May 04, 2022

                      300 Recipes on the Grill


A Step-by-Step kGuide to Using Acrylics in Your Artwork

April 28, 2022

A Step-by-Step Guide to Using Acrylics in Your Artwork

A Step-by-Step Guide to Using Acrylics in Your Artwork


Your Guide to Painting with Acrylics Is Here!

There are a lot of different things that make acrylic paint unique. It's also popular with modern artists, and how do you use it?

In this case, you've come to the right place.

Understanding the intricacies of any paint medium is an important part of the artist's journey because it will help you get the most out of the medium and make some great paintings.

Getting used to any kind of art is a process, so why not start with acrylics?
If you want to learn everything you need to know about painting with acrylics, look no further.

Acrylic paint is what?

Acrylic paint has been used by artists since the 1950s. It is a new type of paint.
It's different because it uses a synthetic resin to keep its color, which means it can be washed away by water.

In this case, because it's made out of synthetic materials that are very elastic, the material doesn't break down when dried.

A lot of people also like that it isn't too thin and comes in a lot of different colours.
Online, you can learn how to paint everything from still life to landscapes and portraits. You can also make your own works of art.


Acrylic paint vs. Oil paint: Which is better?


Acrylic paint is very easy to use because it is water-based.
This means that it dries quickly, which lets artists work quickly and spontaneously.
The fact that it is water-based also makes it easy to dilute when you apply thin washes, because water is always available and doesn't have a strong smell.

It is also easy to clean brushes, which makes the whole painting process a lot faster and less messy.

A Step-by-Step kGuide to Using Acrylics in Your Artwork


Acrylic paint, on the other hand, can be used with confidence in places like the outdoors, where artists need to quickly sketch a scene.

The price of acrylic paint is also less than oil paint, which makes it more affordable and less intimidating to use.

For many people, acrylic paint is a quick and cheap way to get a high-quality finish at a low price.

However, it doesn't have the color intensity of oil paint.

This is because its vehicle (synthetic resin) has a bigger particle size, which means there is less space for color particles or pigments to be added.

Oil paint, on the other hand, keeps its glossy texture when it's dry. Acrylic paint, on the other hand, loses some of its shine.

Because oil paint has a more dense body, it works well for people who want to paint thickly.

That said, high-quality acrylic paint can produce some great results, and the process is very simple.

You should buy good acrylic paint.

Make sure you buy artist-grade acrylic paint from a well-known brand.

Artist-grade paints are high-quality acrylic paints that can be used by artists.
Buy a 200ml tube of white and a few 75ml tubes in different colors.

Red, yellow, and blue are the three main colors in your wardrobe. You should also have secondary and tertiary colors in your wardrobe as well.

Buy both warm and cool shades of each primary color.

There are two types of blue: ultramarine blue, which is warm, and phthalo blue, which is cool (it has a green undertone).

People who want to make a neutral or natural-looking colour mix can use raw umber and Payne's grey, which are third colors.

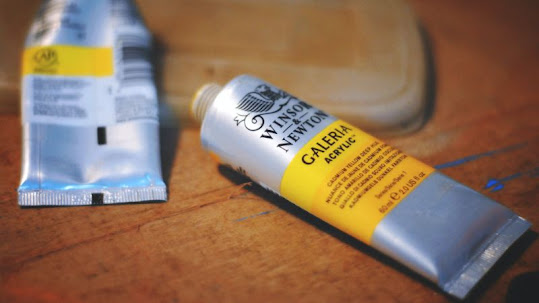
Some well-known, international, and trustworthy brands: Winsor and Newton: For professionals: Acrylics

Artists who use Liquitex Heavy Body Paint Castle Art Supplies has a lot of different kinds of acrylic paint. They use acrylic paints.

All of these paints are made by Chroma Atelier. They are also made by Grumbacher and Blick.

An image of M. Graham Artists' Acrylics by

How do you thin acrylic paint?


When you're painting with acrylics, you'll sometimes need to thin the paint out in order to get certain effects.

Here's what you should do.

First, think about whether the surface is absorbent or not.

Primed canvas would be an example of a surface that doesn't absorb.

Here, the recommended amount of water for thinning down is about 30%, because the water can't get into the surface that has been primed.

Add more than 30% water, and the quality of the color will go down because the water will cover too much of the surface.

An absorbent surface would be made of wood, canvas, or paper that hasn't been painted.

With this surface, you can add any amount of water, because the surface will soak up any extra water and only affect how the paint spreads, not the color.

There are two main ways to thin down acrylic paint: water and acrylic medium.
You can drink water for free.

Too much water, on the other hand, will change the color of your paint.

Acrylic medium, even though it costs more, keeps the paint's color quality while making it easier to mix.

There are different ways to use acrylic paint in art.

Acrylic paint may be the best way to try out new techniques because it is easy to use and quickly dries.

This will give you a completely different look and feel, so why not give them a go?
When you make an acrylic wash, you mix water with your paint to make it more transparent and spreadable.

During the early stages of painting, this is a way to get a lot done quickly.
It also makes the paint less intense, so you can try new things without having to worry about dark lines.

Make sure your paint isn't too thick by following the above steps.

Putting a stop to This is a way to make large, generalized blocks of color.

Painters use this to set the tone and color range of a painting in the early stages of a project.
When you dry brush or scumble, you don't use much paint.

You can paint with a dry brush if you add very little or no water to your brush.
This is usually used to make things look blurry or hazy, because the paint needs to be rubbed on the canvas in a general way to make it look that way.

This is a great way to paint anything that looks like clouds or landscapes.
Watch this video to learn how to paint clouds with the wash, blocking in, and scumbling tools.

Acrylics in Your Artwork


Wet-on-dry

This is a common way to blend or transition between two different colours.
Putting the bottom layer on should be dry so it doesn't mix, then adding water to it so the color of the bottom layer comes through.

This gives a soft, gradual, and glowing look that is great for painting skin or clothes.
Wet-on-wet This is a way to use paint that hasn't been mixed with water on top of another layer that is still wet.

As you finish a painting, you might want to add bold strokes of undiluted colour.
This method can be very messy, so be careful!

If used correctly, however, it can make you feel bold and expressive.

It can also make a thing look more solid and noticeable by making it look bigger.
Impasto It looks like wet-on-dry, but impasto only refers to thick paint, like when you use a palette knife to paint, not when you use a brush.

A palette knife can be used to spread thick wedges of paint across a surface, making it look rough and harsh.

Using thick, undiluted paint gives the painting a bold look that is both colourful and expressive.

A thickener gel can be mixed with acrylic paint to make it look like oil paint.
image Impressionist This technique was first used in the 19th century by artists like Monet and Renoir.

It refers to marks made with only one colour on the canvas that don't blend or mix together.

You can see it in a whole new way.

Pointillism and stippling are two techniques that are similar to this.
Smudging As an example, you could smudge paint with your hand or even a soft cloth.

This creates a soft, ethereal look.

A Step-by-Step kGuide to Using Acrylics in Your Artwork


Smearing


Smearing is when you spread wet paint over a surface with a tool like a grout spreader or a ruler.

This produces an abstract, textured effect.

Splattering and dripping

Splattering refers to the technique of flinging paint onto a canvas without the brush touching the canvas.

If you want to get this look, you should dilute your paint so that it runs off the brush more quickly.

Dripping refers to dripping diluted paint onto a canvas without the flinging action of splattering.

Both of these methods produce a wild, expressive effect that is often used in abstract art.

image

Pouring

Pouring is the act of pouring paint onto a canvas that hasn't been painted.
This makes it easier for the paint to bleed or spread, which makes the colours change in a soft, atmospheric way.

Sgraffito

By scratching into the top layer of a painting, you can see the layers of paint that are under it It is best achieved with a metallic object such as a palette knife or carving tool.
This technique creates a linear, drawn, or textured effect.

Hard-edge

A hard-edge effect can be created by using a clean outline or masking tape.
Movements that used a clean, hard edge effect include Minimalism and De Stijl.

Encaustic

This is an ancient technique that refers to the mixing of colour pigments with hot wax.

The metal tools can be used to scrape or sculpt the surface when the wax has cooled down.

This technique creates a highly textured, expressive effect.

Types of acrylic painting brushes Below are some of the main kinds of brushes you may need in acrylic painting.

Other types of brushes include rigger, mop, fan, and angle brushes. These can be added on as optional extras.

In this case, we are talking about a brush made of This is a brush that can be used for a lot of different things.

It has a large head with rounded edges, making it perfect for painting large areas of colour as well as creating organic lines or soft effects.

Flat brush

This brush has a large head with square edges.

It's good for painting large areas of colour and can be used to make clean, sharp edges that look good.

Round brush

This brush has a round, thin head, sometimes forming a point at the end.
A good thing about this is that it can be used to make lines or add detail.
A brightly coloured brush is on the ground.

This brush has a long, wide head with square edges. It has a short handle.
This is a strong brush that can be used a lot of energy without it getting bent.

impasto


Painting tools

There is such a huge variety of painting tools and materials out there that it can seem overwhelming.

I recommend starting small, finding something that works for you, and slowly adding to your repertoire as your confidence grows.

image

Palette

A palette is a rigid surface used for holding and mixing colour.
You can use a paper tear-off palette for ease of use.

Easel

An easel is an upright stand used for supporting a painting canvas or board.
I recommend an adjustable metal easel.

Palette knife \sA palette knife is traditionally used for mixing paint on a palette.
Modern painters also use it to apply paint to the canvas, giving it an expressive "impasto" look.

Other essential tools

You’ll need glass bottles for containing water for thinning down paint or cleaning brushes and cotton rags for cleaning brushes.

Acrylic painting materials


It is a piece of canvas that has been stretched.

This is a canvas that is stretched on a frame.

This has a responsive surface and deep sides that look professional and is easy to hang.
A good choice is a triple-primed, 300 gsm cotton canvas.

Acrylics in Your Artwork


Canvas panel


This is a canvas that is stretched on a flat, thin wooden panel.
This has a surface that doesn't move and can't be hung, but it's cheap and good for small experiments.

Paper pads


Paper is generally not suited for acrylic paint as it will warp when exposed to large quantities of water and paint.

Thicker high-quality paper such as watercolor paper, however, can be used as an exception.

In this case, consider using 300-gram paper as well as taping your paper sheet to a table or board.

Wood


Wood is affordable and can be cut to size or used for large-scale painting.
However, it is heavy and has a stiff, unresponsive surface.

How to use acrylic paint on wood


Sand your surface with 150 to 200 grit sandpaper to smooth out any surface irregularities and make it easier for your hand to grip it, then let it dry.
If you are using compressed wood, the surface might already be smooth enough to skip sanding.

Next, add about two layers of acrylic primer, waiting for each layer to dry before applying the next.

Finish by lightly sanding your top layer, creating a smooth surface for painting.

image

Putting acrylic paint on a piece of cloth


Why not use acrylic paint on clothes instead of canvas?

The result can look amazing since it has a hand-drawn, bespoke effect.
Use a sheet to protect yourself.

This will stop your fabric from sticking to the surface you are working on, particularly if it is a porous surface such as wood.

Step 2: Thin down your paint with water

When you do this, your paint will move more freely, which is good for making outlines or organic lines.

It will also give it a soft, translucent look.

Step 3: Mix your paint with a fabric medium

A fabric medium is a clear substance that will make your paint look softer and more flexible, which is better for fabric.

It will also stop your colours from bleeding and help the paint to adhere to the fabric.

Step: 4: Heat set your painting

Heat setting refers to hot ironing your painted garment, which increases the durability of the paint due to heat fusion.

This should be done at least 24 hours after the paint has dried.

Also, remember to set the heat on a low level if your fabric is more delicate.

Step 5: Use a low heat setting when washing

This will ensure your painting lasts longer and that it doesn’t accidentally bleed onto other garments!

How do you get acrylic paint off of clothes?

If you want to get the paint into the fabric more, don't rub it.

Instead, use a knife to scrape off any extra paint.

Then dab the area with a wet paper towel.

If the paint is still noticeable, leave the garment to soak in water or wash it as a separate item in a washing machine.

If the paint has already dried on the garment, you can try scraping it off with your nail or a knife.

How do you get acrylic paint off of a brush?

Because acrylic paint is water-based you can use water to clean it off your brushes.
When you use a brush, you need to make sure that you don't hurt the shape of the head. Instead of pushing or scrubbing the brush, try to pull the paint off the end.
You can use a cotton rag or your hand for this.

Don’t let your brushes dry upright as this will cause water to seep and damage the head.

It's better if you let brushes dry horizontally (or even upside down, if you can) instead.

If you make the unfortunate mistake of forgetting to wash the brushes before the paint dries, don’t panic!

It is possible to clean dry acrylic paint from your brushes most of the time: it just takes a little longer.

You’ll need to soak the brushes for five minutes in rubbing alcohol, also known as isopropyl alcohol, and then gently massage the paint out of the bristles with warm soapy water.

You may need to repeat this process a few times.

Try not to do this too often, though, as it can damage the brushes.

In severe cases where the paint was particularly thick and dried completely, you may have to cut your losses and replace the brush.

Keep jars of water near you when you paint, and put them in the sink when you're done with them. This will keep them from getting dirty.

image

How long does acrylic paint take to dry?

The general drying time is about 20 to 30 minutes. High-quality paints take a little longer to dry, though.

When you use an acrylic retarder medium, the process can be slowed down.

The drying process will also be affected by the local conditions, such as when it's hot and dry. This will speed up the drying process.

If you are in a rush to dry your painting, try placing it next to a fan.

Is acrylic paint bad for you?

Standard acrylic paint isn't dangerous.
Acrylic paint is water-based, which means that it doesn’t require any chemicals for cleaning.

If accidentally eaten, it might cause an upset stomach, but nothing more serious than that.

Want to learn more about acrylic painting?

It will teach you everything you need to know about acrylic painting with the help of  an online painting course.

You’ll also learn about color theory, the elements of art, and a little bit of art history.

Throughout the course you’ll create paintings of your own, including a still life, landscape, portrait, and post-modern painting.

If you want to find out more CHECK BELOW.....


ads 728x90 B
Powered by Blogger.