I’m sure you’ve heard about the “Docker hype” in the tech industry these days. Docker has made running applications on any kind of environment super easy. Do you know what makes Docker even more efficient? Using it with Amazon’s ECS. This article on Amazon ECS gives a detailed explanation of using Docker in production using Amazon ECS.
Agenda For This Article:
Introduction to Docker
Docker is a software development platform. It’s based on the concept of containerization. It wraps the application along with all its dependencies into a single container image. This container can be deployed on any platform to run that application. So basically these applications run exactly the same regardless of where they are running or on what system they’re running on. It uses an online cloud repository called DockerHub to store all these container images.
Introduction to Amazon ECS
Now that you’ve understood Docker, let’s have a look at ECR. As part of container services platform, AWS provides Amazon EC2 Container Registry (Amazon ECR). Its a fully managed docker container registry.
Now you have your containers, all you need is a platform to host them. This is where ECS come into the picture.
ECS stands for Elastic Container Service. It’s a container management service. Running, stopping or managing Docker containers on an ECS cluster is like taking a walk in the park. You can launch, stop or scale any container-based applications by just making a few simple API calls.
I’m sure you guys would have heard the term microservices which is pretty hot in the tech market right now. Amazon ECS can let you create consistent deployment by building sophisticated application architectures on the microservices model.
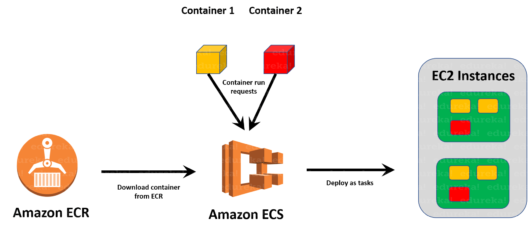
How ECS Works
Now that you’ve understood the theoretical concepts let’s dig a little deeper into how ECS works. Let’s take a very common scenario, say you’re running an application that uses two docker container. For instance, one container has the actual application and the other has all the dependencies. You need both of these to successfully run the application.
Amazon ECS consists of the following:
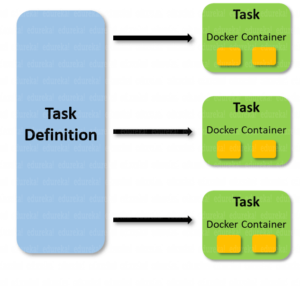
Task Definition
Task definition is basically the blueprint describing the docker containers that are used to run the application. In our case, it will be the two docker containers, details of the images used, the CPU memory to be allocated, environment variables to be declared and used, ports to expose, etc.
Task
A task is an instance of the task definition. It runs the container along with the container details mentioned in the task definition. Multiple tasks are created by a single class definition as and when required.
Service
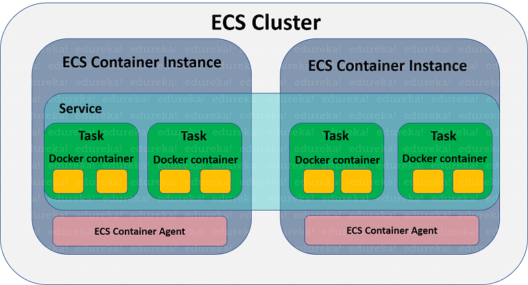
Service defines the minimum and the maximum tasks that are running from a single task definition at any given point. In our example, if there is one task running from a task definition and if the CPU gets maxed out, ECS adds another task. At the point, the service would be 2 as two tasks are running from one task definition.
ECS Container Instance And ECS Container Agent
Every docker container will run on an EC2 instance. Such EC2 instances are called ECS Container Instance.
Every ECS container instance will have an ECS Container Agent running on it. This agent communicates between the instance and ECS which helps in managing the running containers or even adding new ones.
Cluster
We now have the task definition, tasks, and services. All we need is a platform to hosts these. That platform is the cluster. A cluster is a group of ECS container instances. A cluster can run many services. For instance, you have multiple applications as a part of your project, you can run several of them on a single cluster. This reduces the wastage of the resources and indirectly saves your money.
Features And Benefits Of Using ECS
- It lets you run application containers in a highly available manner across multiple Availability Zones within a Region
- It lets you use containers without infrastructure management.
- You can containerize anything and everything and let ECS manage it.
- It’s super secure as you can store your container images on EC2 container registry which is very safe as your images are encrypted at rest.
- Another amazing feature of ECS which I honestly love is that it keeps the IAM roles separate for every task. The control access to every task is very guided.
Demo: Run A Docker Image In A production Environment Using Amazon ECS
In this demo, I’m going to show you how to use Amazon ECS and run a docker image on it. Let’s get started.
Go to Amazon’s login page and sign in if you already have an account. If you don’t, then go ahead and create a free account. This is the console that you’ll see once you’ve logged in.
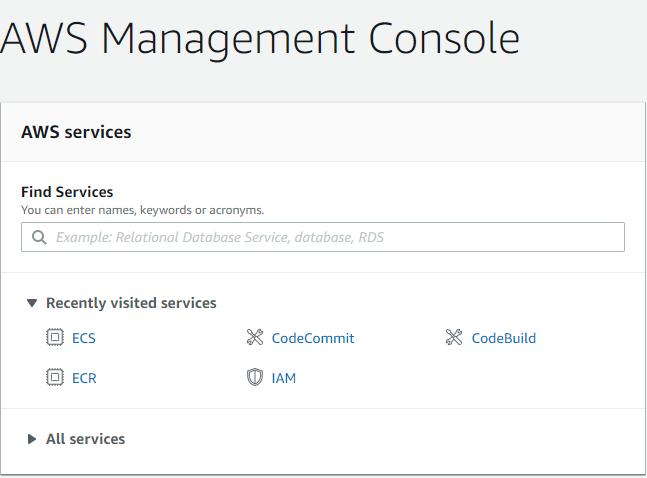
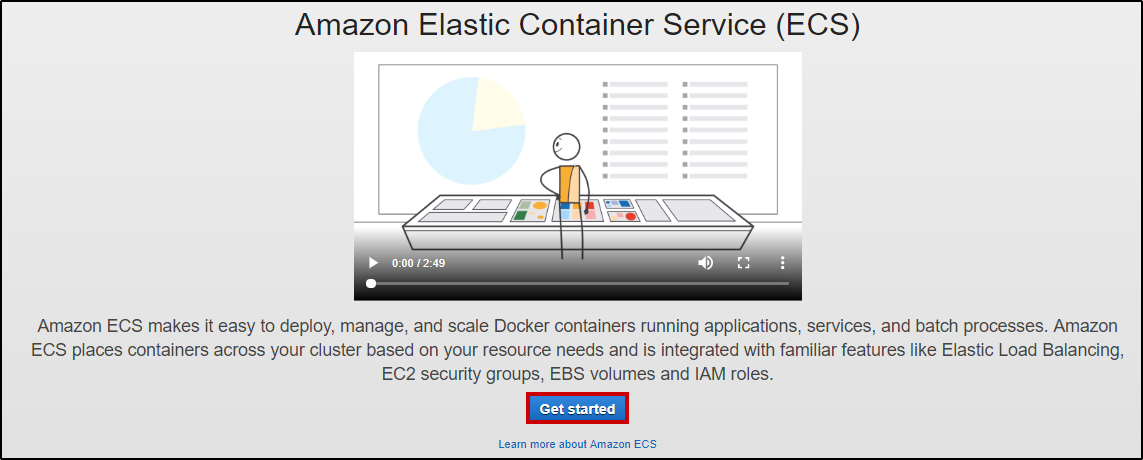
Type in “ECS” and click on that service. You’ll see a Get started button if you haven’t created a cluster before. Go ahead by clicking on Get Started.
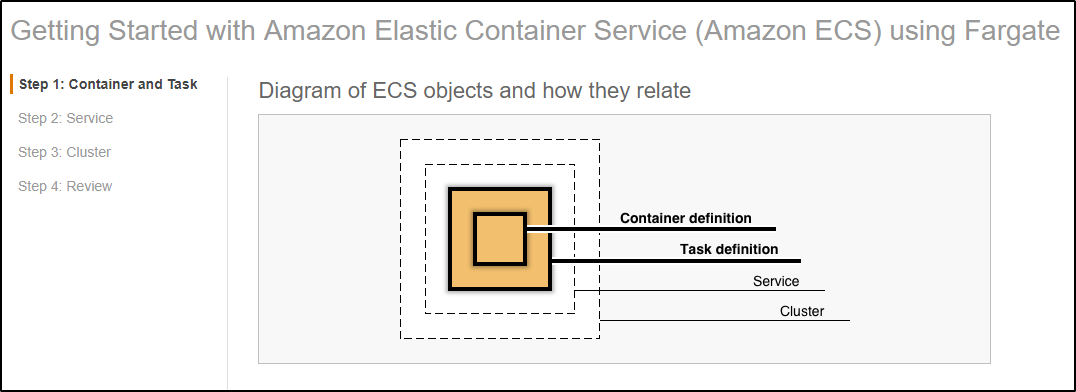
Running a docker image on AWS ECS has 4 main steps, Container definition, Task definition, Service, Cluster.
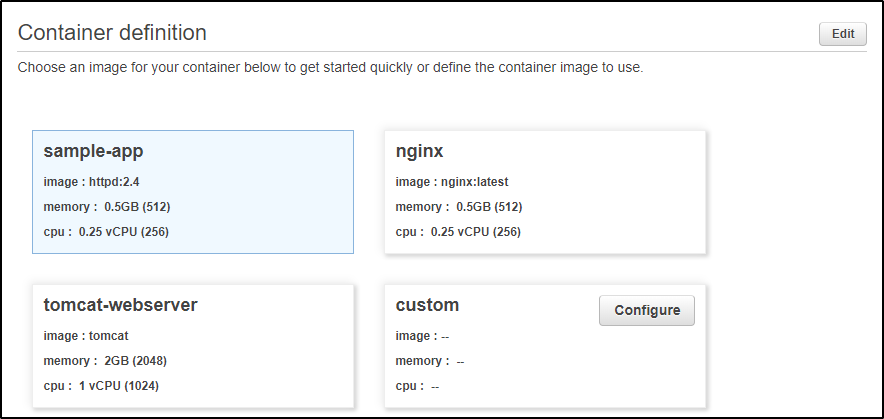
Configure Container Definition: Select an image for your container. You have 4 options – A sample application image, Nginx image, tomcat-webserver, and a custom image.
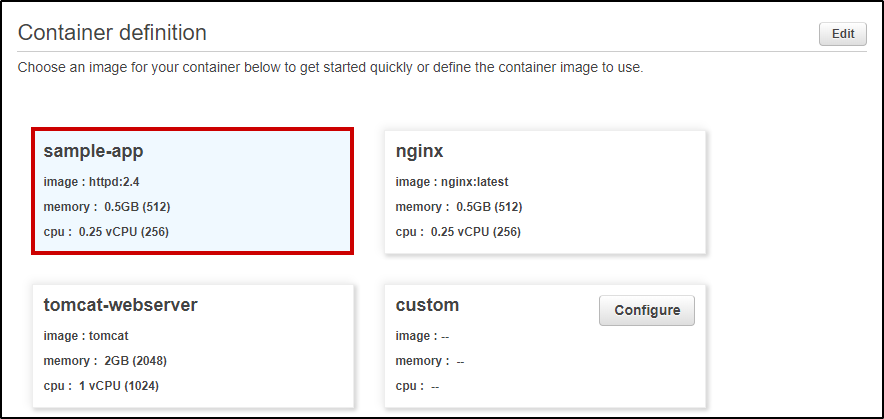
For this demo, I’ve chosen the sample-app.
Click on edit on the top right corner if you wish to change the configuration.
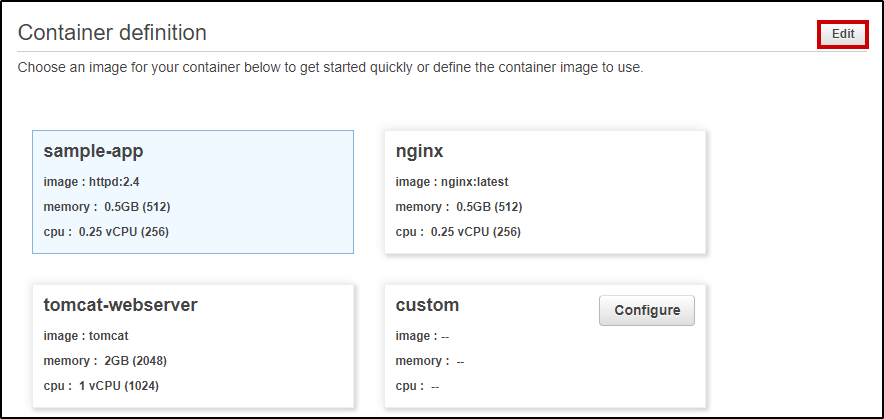
You can edit the container name, the image to use, Memory limits, Port mappings, Healthcheck configurations, Environment configurations, Container timeout configurations, Network settings, Storage and Logging configurations, Resource limits, and Docker Labels. For this demo, I’ve used all the default configurations.
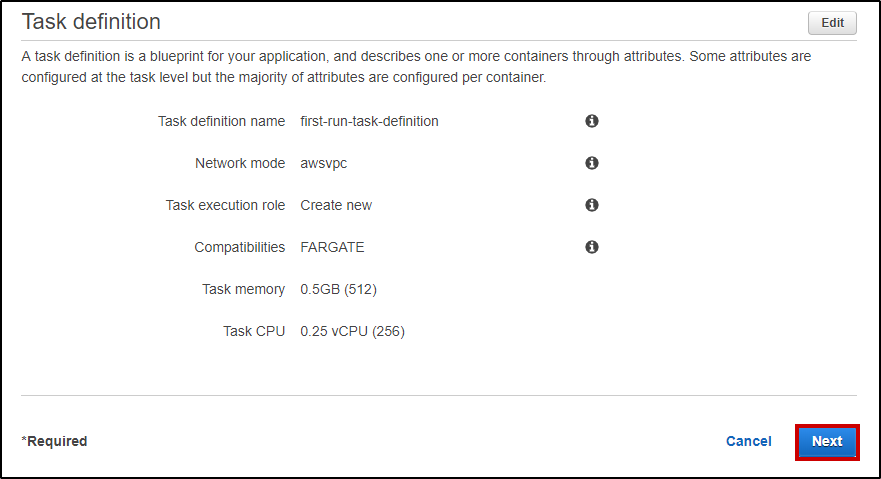
Configure Task Definition: It consists of Task definition name, Network mode, Task execution role, capabilities, task memory, and Task CPU.
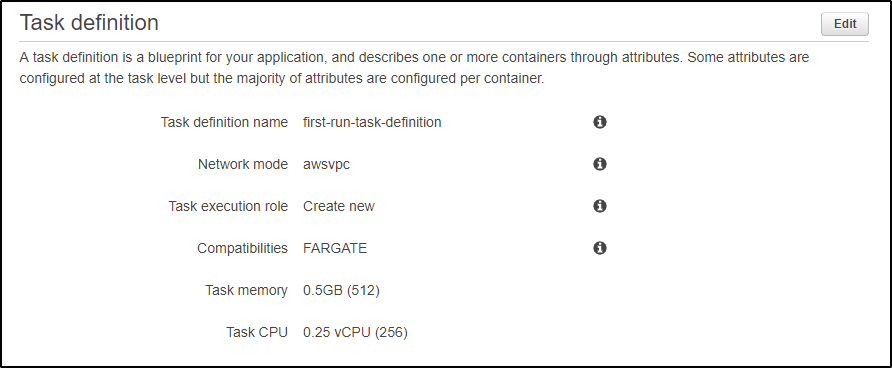
You can click on Edit on the top right corner and configure according to your needs. For this demo, I’m using all the default configurations. Once you’re done, click on Next on the bottom right corner.
Configure Service: You can go ahead and change the Service name, Number of desired tasks, Security Group and Select the Load balancer type. For this demo, I haven’t used a load balancer. Click on Next.

Configure Cluster: Configure your cluster by adding a Cluster name and click on Next.

Review: Once you’ve configured everything, you should see something like this.

Review everything and click on Create on the bottom right corner. All the services will now get created. This might take about 10 mins.
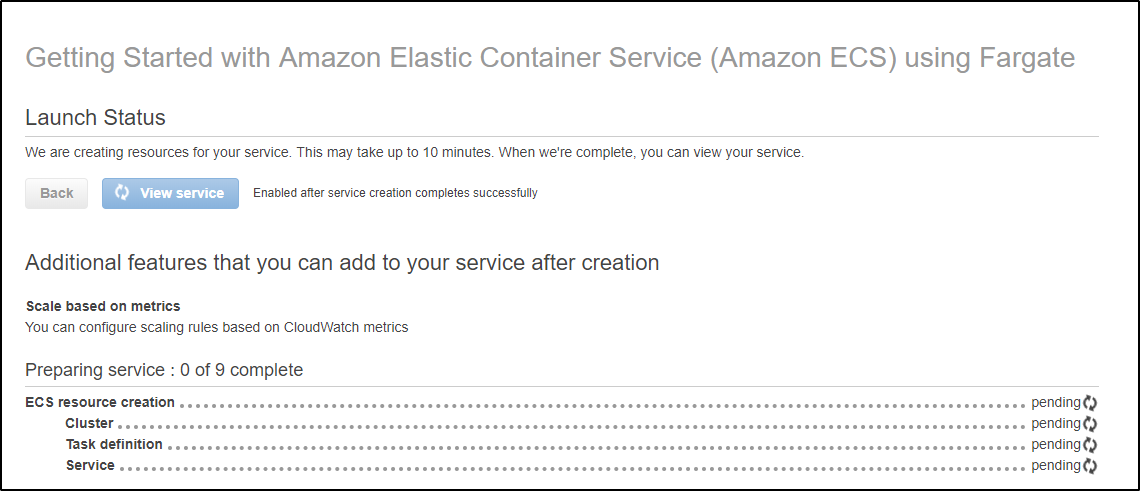
Once everything has the completed status, click on View Services
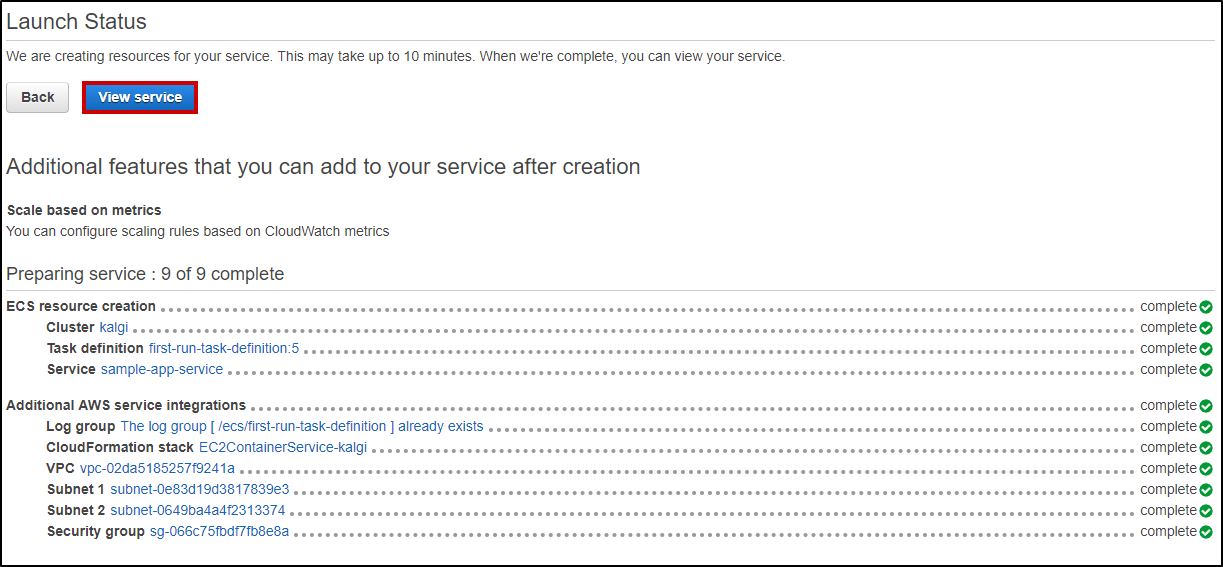
You’ll see something like this. It’s going to show you your cluster details, task definition and an option to delete and update it.

You can check further details like the VPC, Subnets, Tasks, Events, Autoscaling, Deployments, Metrics, Tags and Logs.

Now go ahead and click on task to check out the deployed container.

Click on the task name as shown below.

Click on ENI Id under the Network section.

You’ll be taken to the Network Interface page which would look like this:

Scroll down and you’ll see your IPV4 Public IP. Copy it.

Paste it on any browser like a URL. You’ll see the docker container output there. You’ll see your sample-app.

This was just a sample-app. You can run any kind of application or any kind of Docker image in just a few steps.
This brings us to the end of this Amazon ECS article. You can integrate this service with various DevOps tools and can make the building process easier. I hope this blog was helpful. For more such blogs, visit “Edureka Blog“.
If you wish to learn more about Cloud Computing and build a career in Cloud Computing, then check out our Cloud Computing Courses which comes with instructor-led live training and real-life project experience. This training will help you understand Cloud Computing in depth and help you achieve mastery over the subject.
Got a doubt? Please mention it in the comments section or post it on Edureka Community and we will get back to you. At Edureka Community we have more than 1,00,000+ tech-fanatics ready to help.



No comments: